Key Takeaways
- Start with a clear product brief, audience, and visual goal.
- Use sketches and references to guide AI-generated concepts.
- Choose the right method based on accuracy and project needs.
- Review product details, proportions, text, and branding carefully.
- Create a few purposeful variations instead of many random outputs.
- Keep files, versions, references, and approvals organized.
- Prepare visuals for each platform and format.
- Measure both creative quality and production efficiency.
- Keep human review and final approval part of the workflow.
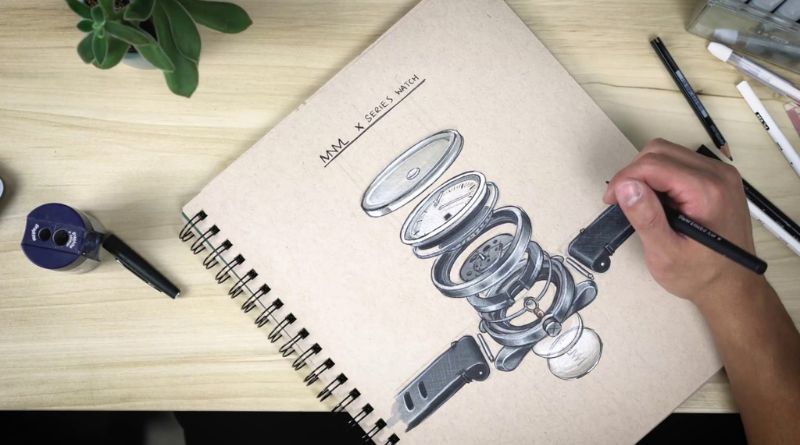
AI-assisted visualization can help teams turn early product ideas into clear, persuasive images faster, but the strongest results come from a disciplined process rather than a single clever prompt. Teams comparing different creative platforms and vizcom alternatives should start by defining the visual decisions they need to make, not by chasing the most dramatic first output. A useful product visual does more than look polished. It communicates what the product is, who it is for, how it fits into a real setting, and which details are essential. When sketching, generating, reviewing, and finishing happen in a clear sequence, teams can reduce rework while keeping the product story consistent.
Why The Workflow Matters
AI visualization works best as a repeatable system. A clear workflow separates exploration from approval, makes feedback easier to understand, and prevents teams from mistaking an attractive image for an accurate product asset. The growing integration of sketches, models, and prototypes is evident in research on converting 2D designs into 3D models, but human judgment remains essential at every stage.
Start With A Clear Brief
Before generating anything, create a brief that names the product, target customer, setting, mood, materials, color range, camera angle, and final use. Also, identify the aspect ratios required for product pages, presentations, social posts, or videos.
Weak Brief vs. Strong Brief
A weak brief might say, “Create a premium image of a reusable bottle.” A stronger brief says, “Show a matte navy insulated bottle with a loop handle on a commuter’s desk, using soft morning light, a close three-quarter angle, and a clean editorial style. Keep the lid shape, handle size, and logo placement unchanged.” Better input saves more time than endless revisions.
Turn Sketches Into Visual Directions
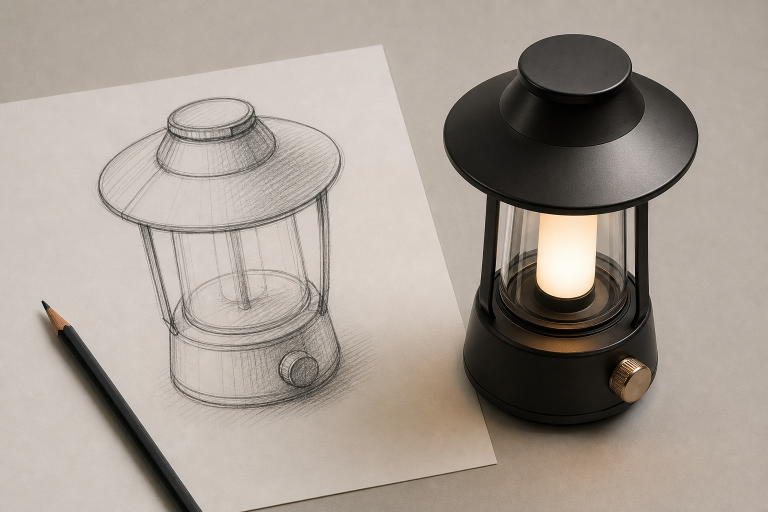
A rough drawing is not a limitation. It is a practical way to establish structure before visual experimentation begins. Use the sketch to identify fixed shapes and proportions, then decide which elements are open to testing, such as lighting, location, material finish, background, or customer context.
- Upload or describe the early concept.
- Mark the product features that cannot change.
- List the visual variables that need testing.
- Create a small set of distinct directions.
- Select one direction for deeper refinement.
Choose The Right Visual Method
Different project goals call for different methods. Text-to-image is useful for mood boards and broad ideas. Image-to-image is better when a reference composition or silhouette must remain close. 3D-based rendering is the stronger choice when measurements, geometry, or manufacturable form matter. Video generation can demonstrate movement or interaction, while manual finishing remains important for typography, packaging, fine retouching, and technical corrections.
Build A Repeatable Review Cycle
Generate a limited group of early options, compare them against the brief, and label what should stay, change, or disappear. Then refine only the one or two strongest directions. Invite feedback from design, marketing, and product stakeholders before expanding the asset set. Feedback should use specific criteria: shape accuracy, message clarity, audience fit, brand alignment, and product realism. Comments such as “make it better” create extra rounds because they do not identify the actual decision that needs to change.
Protect Product Accuracy
Beautiful visuals can still fail when they alter a button, seam, label, handle, logo, texture, or proportion. Compare outputs with approved references, inspect details at full size, and review all text and numbers by hand. Keep concept images separate from production-ready assets, and assign a person to make the final approval decision. Also, establish rules for unreleased designs, customer information, and uploaded reference files. A quick creative experiment is not worth exposing confidential product details or bypassing internal review requirements.
Create Variants Without Losing Focus
Once a direction is approved, test variations methodically. Change one major variable at a time, such as setting, crop, color treatment, or audience context. Use the same approved product reference across versions, label each file clearly, and keep experiments separate from approved work. A focused set of four strong variations is usually more useful than thirty loosely related images. Fewer options make comparisons easier and help reviewers make decisions aligned with the original goal.
Prepare Assets For Real Use
Final delivery requires more than exporting one image. Prepare portrait, landscape, and square crops where needed, then check color, sharpness, and cropping on real devices. Organize source files, approved exports, version notes, and usage rights information so that another team member can confidently reuse the work. For example, one approved visual system can become a wide product-page hero image, a vertical launch email graphic, and a short social video. The product remains recognizable because lighting, materials, framing, and brand cues remain consistent across all formats.
Measure Quality And Speed
Track the time from brief to first useful concept, number of revision rounds, percentage of assets approved without major correction, time spent fixing product details, and number of usable outputs created from one approved direction. Collect feedback from designers, reviewers, and customers as well. Speed is only one measure. A faster workflow that creates inaccurate, off-brand, or unusable visuals may increase costs later through corrections, missed deadlines, and confused customer expectations.
Common Mistakes To Avoid
- Starting without a goal: Define the audience and intended use first.
- Changing everything at once: Test one major variable per round.
- Trusting the first impressive output:Check it against approved references.
- Ignoring measurements: Use 3D or manual correction when precision matters.
- Generating too many options: Curate a short set for review.
- Skipping human approval: Keep a qualified reviewer responsible for final sign-off.
- Failing to save the process: Record prompts, references, decisions, and final settings.
Final Checklist
- Is the product, audience, and use case clearly defined?
- Are fixed product details listed and referenced?
- Has the visual method been chosen for the actual goal?
- Are files, references, and versions organized?
- Has each revision been reviewed against clear criteria?
- Have text, proportions, and fine details been checked?
- Are final files ready for every planned channel?
- Has a person approved the final asset set?
AI can speed up visual thinking, but reliable results still depend on clear direction, careful review, and a clean handoff into the broader creative process. As new visual design tools continue to emerge, teams that build strong habits around accuracy and decision-making will get the most value from them.
Conclusion
AI-assisted product visualization can speed up the creative process, but its real value comes from using it within a clear, organized workflow. A strong brief, useful references, purposeful variations, careful product checks, and human approval help ensure that generated visuals remain accurate and aligned with the intended message. Teams should focus on producing a small number of useful concepts rather than chasing endless outputs, while keeping versions, feedback, and final assets properly organized. By combining AI experimentation with thoughtful design judgment and consistent review, businesses can reduce rework, improve production efficiency, and create product visuals that are both visually appealing and reliable across different platforms.